Facebook messenger bot webhook with python FastAPI
Assume that you have signed up for a Facebook developer account and created a new app set up for messenger, now it is time to build codes for receiving, processing, and sending messages.
To be able to do all these, you will first need to set up a basic webhook to pass facebook messenger’s required webhook verification step. This guide will show you how to do it with python FastAPI and set up a framework for expanding your messenger bot for later.
Create a new python FastAPI project
FastAPI is a modern and popular python framework for building APIs. FastAPI is very similar to Flask, another popular framework for python. One should be able to move a simple Flask app to FastAPI in seconds. However, FastAPI may be much faster than Flask because it is built over ASGI (Asynchronous Server Gateway Interface). It is very easy to write asynchronous code with FastAPI whereas with Flask you will probably need help from additional tools such as Celery.
To get started with FastAPI, install fastapi and unicorn via pip:
pip install fastapi
pip install uvicorn
Now create “app.py” file and set up the FastAPI app.
from fastapi import FastAPI, Request, Response

# setup FastAPI app
app = FastAPI()
Below that we add a /webhook endpoint to accept GET requests. This will be where we handle the required webhook verification step.
# receive messages Facebook sends to our webhook
@app.get('/webhook')
def init_messenger(request: Request):
	# TODO: complete this method
	pass
Next, we can define how our app will run with uvicorn. Here I set “log_config=None” so that I can use python’s logging module as usual. Alternatively, you can configure your own uvicorn’s LOGGING_CONFIG.
if __name__ == "__main__":
    uvicorn.run("app:app", log_config=None, debug=True, reload=True)
This is all we need for now for a backbone FastAPI app and we will complete our /webhook endpoint in the next section.
Add support for GET requests to our webhook
For the required webhook verification step, we will need to create a “verify token”. This verify token is just a random string that you make up. You need to then provide the verify token both to the Facebook Messenger Platform and to your FastAPI app.
Since the verify token is sensitive, it is not a good idea to hardcode it into the webhook in “app.py”. Instead we create a “.env” file to manage it.
FB_VERIFY_TOKEN=<YOUR_VERIFY_TOKEN>
We will use dotenv to retrieve the verify token we saved in .env file.
pip install python-dotenv
In “app.py” we get our verify token as an environment variable.
# use dotenv to handle .env
import os
from dotenv import load_dotenv
load_dotenv()

# get environment variables
VERIFY_TOKEN = os.getenv('FB_VERIFY_TOKEN')
When the Facebook Messenger Platform sends a GET request to our webhook, we can find the token in the hub.verify_token parameter of the query string. At our endpoint, we simply check if the verify token sent by Facebook is the same as the one we know.
@app.get('/webhook')
def init_messenger(request: Request):
	# FB sends the verify token as hub.verify_token
    fb_token = request.query_params.get("hub.verify_token")

    # we verify if the token sent matches our verify token
    if fb_token == VERIFY_TOKEN:
    	# respond with hub.challenge parameter from the request.
        return Response(content=request.query_params["hub.challenge"])
    return 'Failed to verify token'
After successful verification, the Messenger Platform will subscribe our webhook to the messenger.
Test our webhook with ngrok
Now we can run our FastAPI app locally. To test it with the Facebook Messenger Platform, we need a secure URL to our localhost server and we can get it using ngrok.
Once ngrok is set up, we run our FastAPI app locally and in the terminal run the following command. “8000” because it is usually the default port for FastAPI app.
ngrok http 8000
This will give us an instant URL, this URL is dynamic and will change every time we run ngrok again. You will see something like this in your terminal:
ngrok by @inconshreveable                                 (Ctrl+C to quit)

Session Status                online
Account                       xxxx.xxxxxxx@xxx.com (Plan: Free)
Version                       2.3.35
Region                        United States (us)
Web Interface                 http://127.0.0.1:4040
Forwarding                    http://f3b4c20292d3.ngrok.io -> http://localhost:8000
Forwarding                    https://f3b4c20292d3.ngrok.io -> http://localhost:8000

Connections                   ttl     opn     rt1     rt5     p50     p90
                              1       0       0.00    0.00    5.02    5.02
Make sure to copy the “https” address and go to your app on the Facebook Developer Platform. You should be able to find the “Settings” page for “Messenger” and the “Webhook” section. Now you can “Edit Callback URL”.
The callback URL will be the https address copied from ngrok and the “/webhook” endpoint. The verify token needs to be the same as the string we put in the “.env” file.
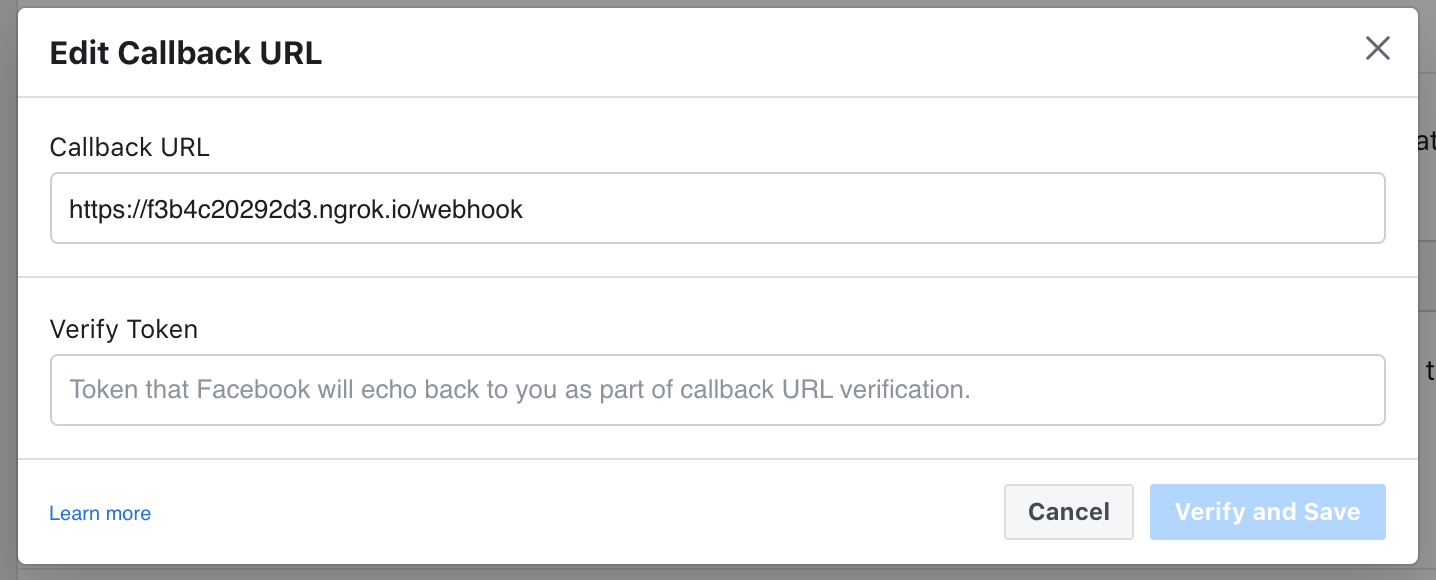
When you click on “Verify and save” and no error is shown, that means you successfully completed the webhook verification 🎉. You should also see that the GET request at our /webhook got a 200 OK in the terminal running ngrok.
HTTP Requests
-------------

GET /webhook                   200 OK
Next steps
Setting up the webhook is a huge step for writing a Facebook Messenger bot. The more exciting step, however, is to be able to receive messages from users and reply to their messages. There are multiple ways to do it in python. Another post for another time.